Lung ultrasound is quick, easy, and very helpful in a patient with undifferentiated shortness of breath. There are, however, a few subtleties that I often see learners not grasp. Let’s clear it up.

The two things people stumble on while learning this exam are the following:
- Holding the probe parallel to the ribs rather than perpendicular to them
- Not realizing that the preferred depth setting changes depending on what you are looking for
Probe orientation
As people learn the exam, it feels natural to put the probe parallel to the ribs. I suppose it is logical to not want the ribs in the way of the lungs on the image. However, the convention is to put the probe perpendicular to the ribs letting them serve as landmarks on which to anchor.

Although I’d hate to say “never”, I will say that you should get comfortable with conventional imaging standards before diving into the weeds. The conventional probe orientation is perpendicular to the ribs with probe marker toward the patient’s head. I like to see learners master that view.
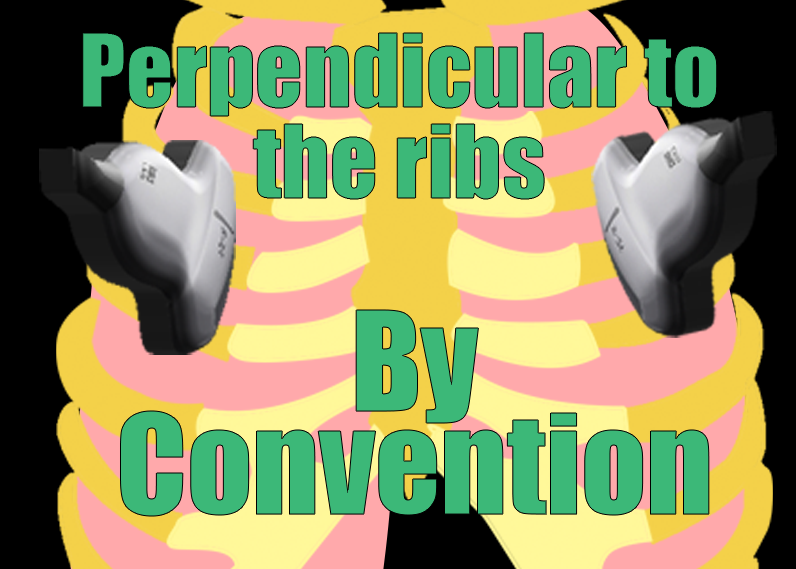
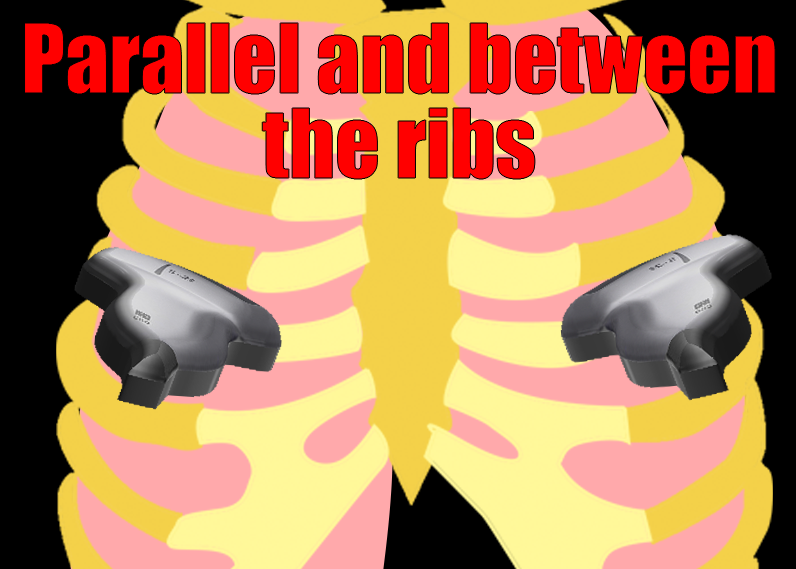
Image Depth
Not every lung ultrasound is the same, and the exam changes a little based on what you are looking for. If you are looking for a pneumothorax (an EFAST exam for example), you want to scrutinize the pleural line for sliding. On the other hand, if you are working up someone with acute shortness of breath, knowing whether their lungs are wet or dry might be what you need to know.
Specifically, if you are looking for lung sliding, you need to use a setting with very little depth so that the pleura is prominent on the screen. A linear probe is ideal, but a curvilinear probe with the depth dialed way down is fine as well.
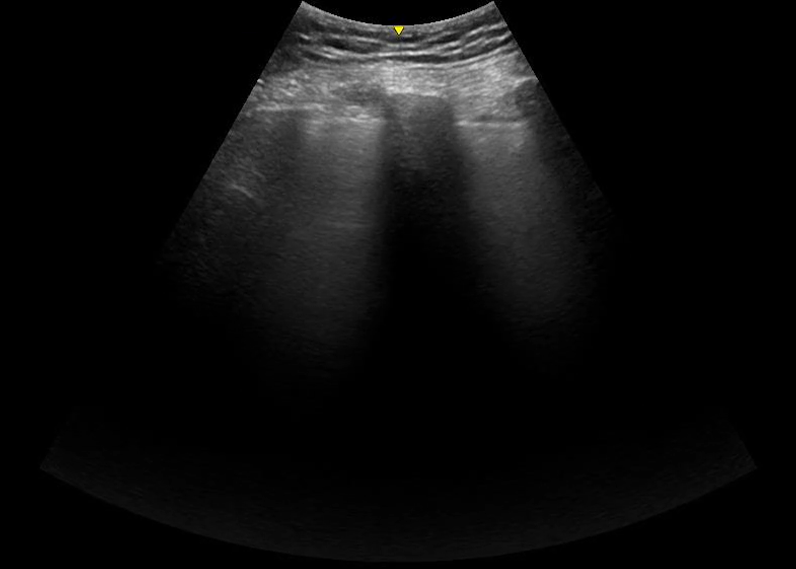
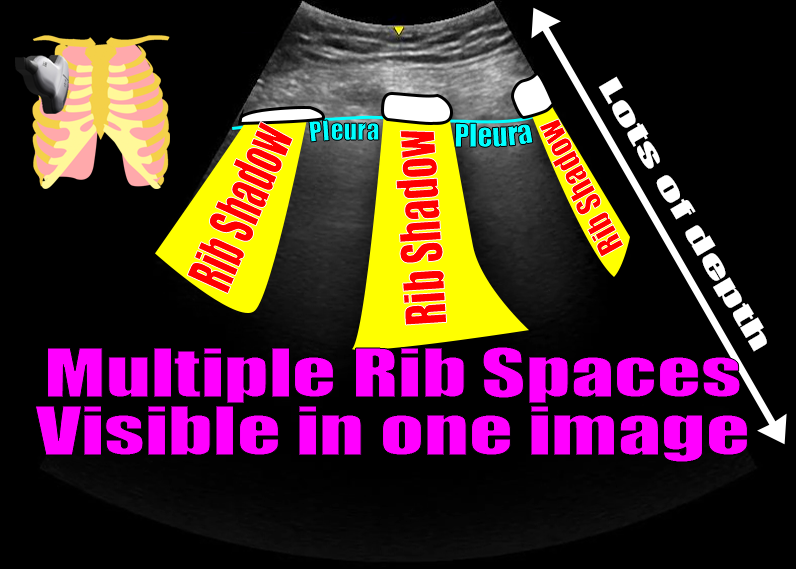
If you are looking for B lines (which is what differentiates wet lungs from dry lungs), you need more depth to the image. B lines – by definition – do not fade. They reach the far edge of the image no matter how deep the image settings are. That is opposed to comet tail artifact, which is a normal finding. A comet tail artifact, like a B line, is a vertical white line that originates at the pleura and moves with the sliding lung. However, unlike a B line, they are short and fade away without reaching the deepest edge of the image. Depth neatly separates the two. A curvilinear probe is nice for achieving that depth and has the added benefit of letting you see several rib space at once. (Multiple rib spaces are handy because the differential for diffuse B lines is very different from that for focal B lines.)
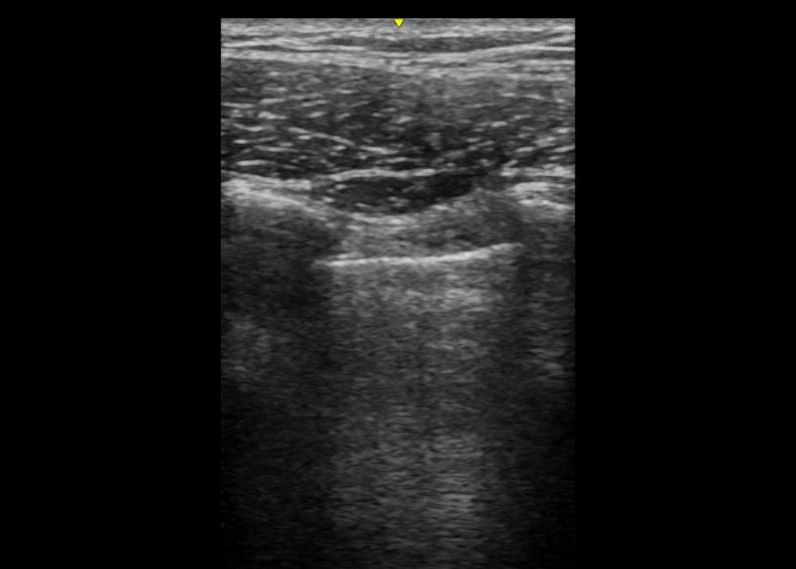
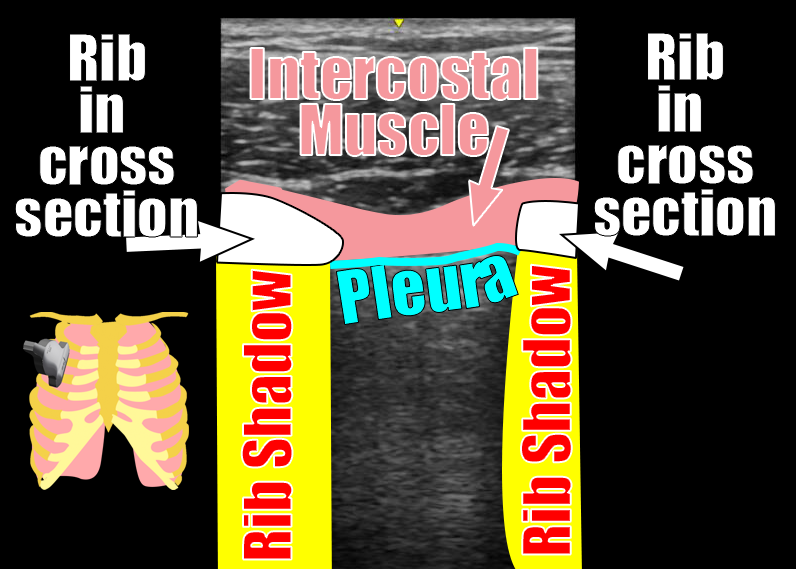
Below are examples of images obtained with the probe in the conventional orientation – perpendicular to the ribs with the probe maker up. Notice how much clearer the lung sliding is in shallow image taken with the linear probe.


If you are zoomed in closely, it can be difficult to say what is a comet tail artifact and what is a B line. On the other hand, if you are using a deep depth of field, the only thing that can be bright and go all the way to edge of the screen is a B line. Consider the examples below.
Comet Tail Artifact – a common finding in normal lung
These are comet tail artifacts. Notice that they are short and diminish in brightness over a few centimeters
B lines – evidence of fluid in the alveoli

These are B lines. We know that definitively because they stay bright and go to the edge of the screen.
What about this image?
Some of these lines at the pleural surface are bright and seem to go to the edge of this screen. But would they go to the edge of any screen and thus identify themselves as B lines? There is only one way to find out – switch probes and increase the depth.
Let’s wrap it up
Lung ultrasound is fast, easy, and high yield. However, it is not one size fits all. In general, it’s always a good idea to at least start your exam with the probe perpendicular to the ribs and marker towards the patient’s head. In terms of depth, you must consider what you are looking for. If you are scrutinizing the pleura for the presence of sliding (i.e. ruling out pneumothorax in a EFAST exam) you want the depth to be very shallow and probably want a linear probe. On the other hand, if your goal is to look for pulmonary edema, a greater depth (and thus a curvilinear or phased array probe) will make it easy to differentiate B lines from comet tail artifact.
Of course there is other lung pathology ultrasound can help with (pleural effusions, etc), but I think these thoughts will get you started on the right foot.

Nerdy thoughts about B Lines versus Comet Tail Artifact
Although they look similar, these two artifacts are caused by different phenomena. Comet tail artifact is said to be a “reverberation artifact” meaning the ultrasound beam is deflected back and forth when multiple highly reflected surfaces are near one another – physiologic fluid in the pleural space in this case. B lines, on the other hand, are considered a “ring down artifact“. In this case, it is not the ultrasound beam that is getting deflected, rather it the fluid in a particular shape that resonates when exposed to the beam.
